Intro
Before starting a getting started guide, I would like to mention that the plugin comes with a working sample game that is available inside the plugin’s directory. To play the example labirynth mini game and view example assets head to Sample Content page for detailed description.
This page will go through steps required to setup advanced sight plugin from scratch using a third person template game in Unreal Engine 5.4.
The plugin can be used in a none-code projects. It contains all required classes and functions exposed to blueprints to use, no need to write any C++ if you don’t want to.
Please note that the steps below are blueprint based but whenever a component is added to a blueprint, or a new blueprint is created, remember that this might as well be a new C++ subclass or a component created in a C++ class.
Project Settings
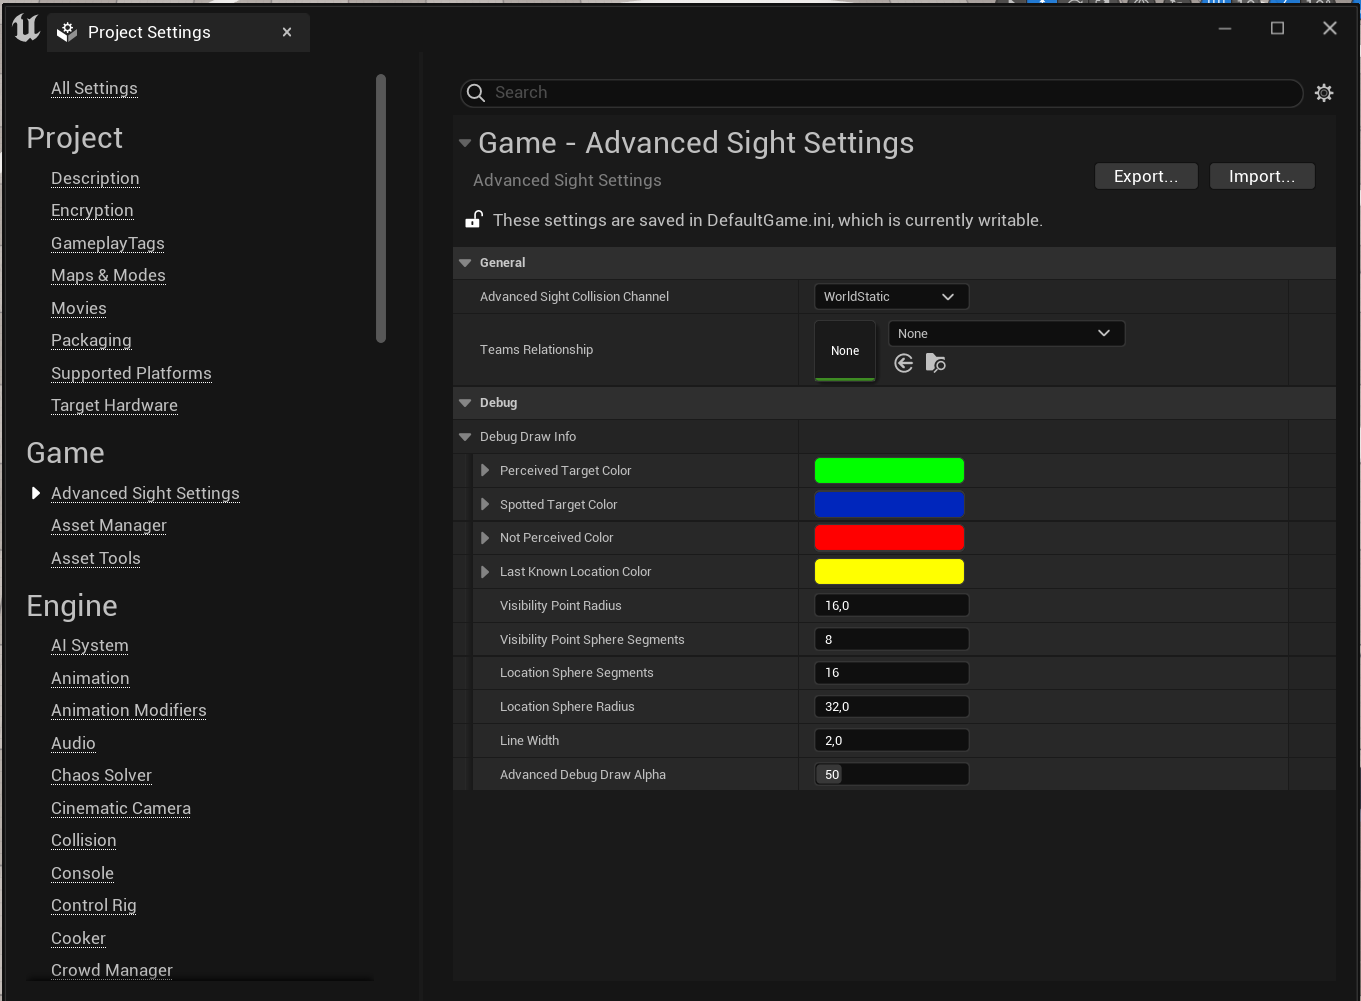
Make sure to take a look at the plugin’s settings inside Project Settings window. If you have already part of your game ready and you are migrating from a different sight system make sure you update Advanced Sight Collision Channel to the one you used for visibility checks. By default the system uses WorldStatic collision channel.
Feel free to play with colors and details of debug drawings as well to match your personal preference or needs if your game uses specific color palette making default colors hard to see.
Teams Relationship
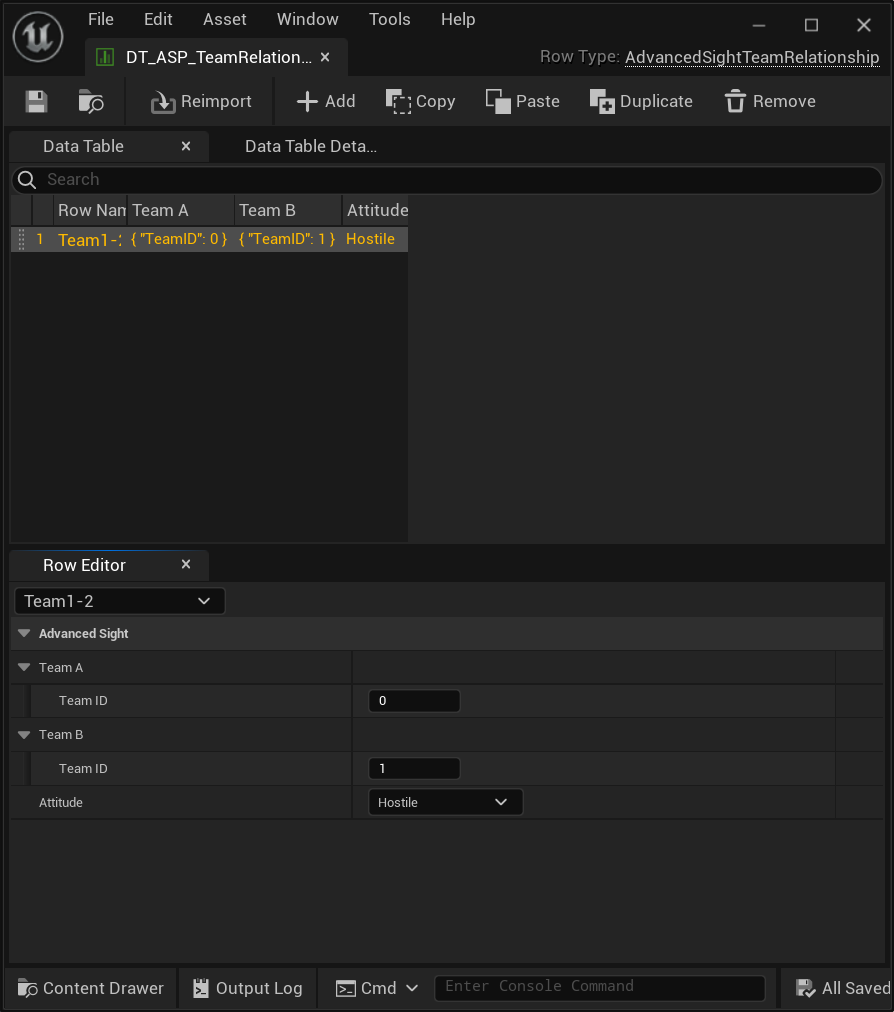
The sight detection works based on a team affiliation. This data is set inside a sight data asset and allows a user to define whether an agent should see hostile, neutral or friendly targets. By default, the system treats all targets with the same team ID as friendly, and all other teams as hostiles. It is possible however to override this by defining custom relationships between different teams. This is especially useful in cases where there are more than two teams (NPC vs Player). Two different AI teams can be friendly to each other, but hostile to the player team.
The project comes with one predefined data table named DT_ASP_TeamRelationship. I highly recommend duplicating it instead modifying the original one to make sure it doesn’t get overriden when updating the plugin to latest version.
Once a data table contains all the teams relationships we care about it must be set inside project settings under Game / Advanced Sight Settings tab.
Please note that chagnes to the data table are not reflected live in the game as it’s content is copied at the beginning of the world. If you update the data you must either reload the map or restart the PIE session.
AIController
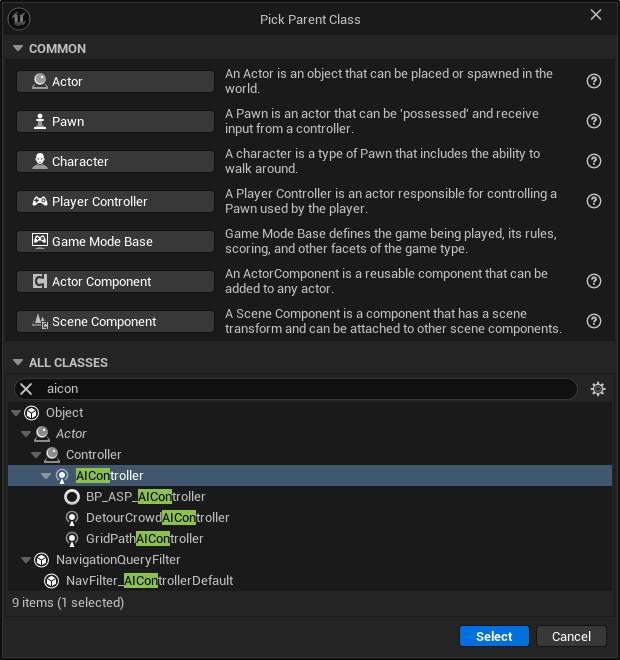
Let us begin by creating an AIController subclass that will be controlling our AI agent. Right click in Content Browser and press Blueprint Class. Then search for AIController.
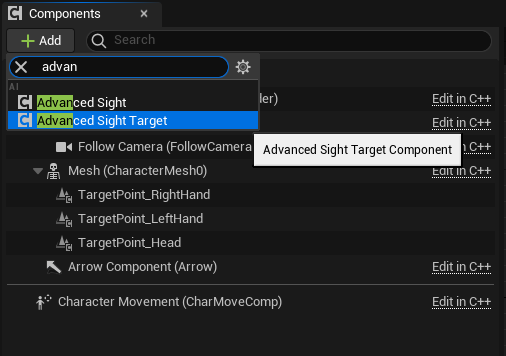
Once new AIController subclass blueprint is created and opened, head to the Components panel (usually on the left hand side of the blueprint editor) and press Add button. Search for Advanced Sight Component.
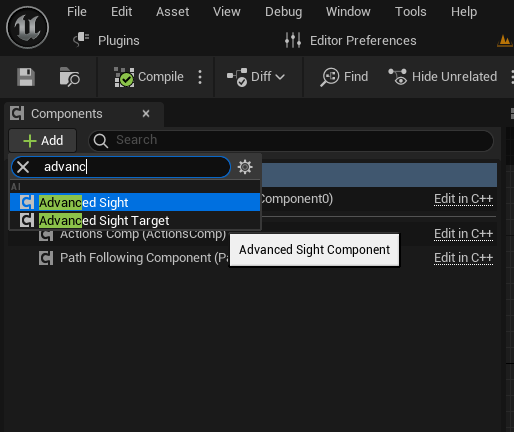
Please notice that there are two components with very similar names. One is Advanced Sight Component and the other is Advanced Sight Target Component. Make sure you select Advanced Sight Component in this step.
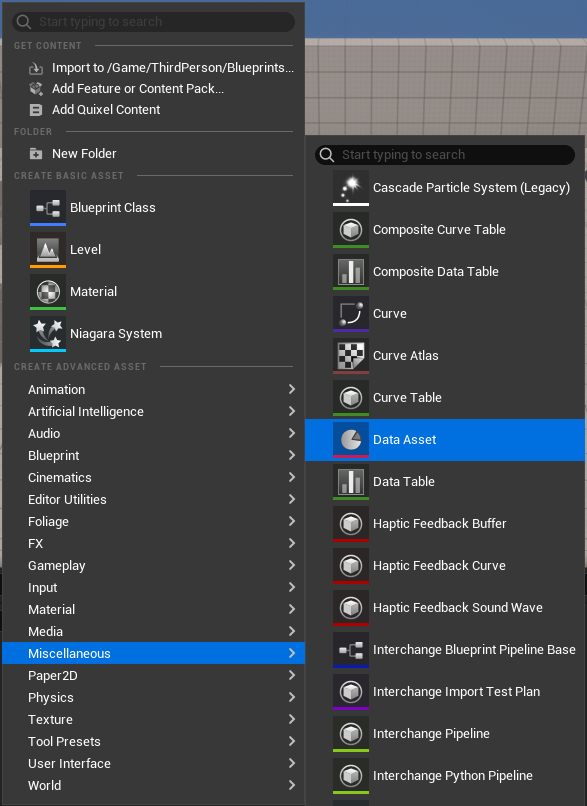
Now let’s create a data asset for the advanced sight component defining all the perception details. Head to Content Browser once again and press RMB, go to Miscellanous category and select Data Asset.
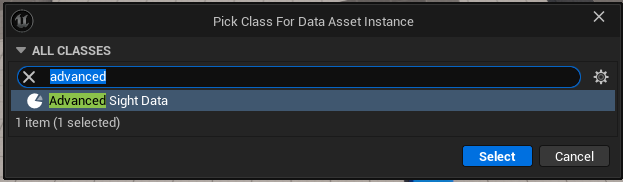
In a window that will appear in front, search for Advanced Sight Data. Then select it and press Select button.
Once created and opened following window should be visible:
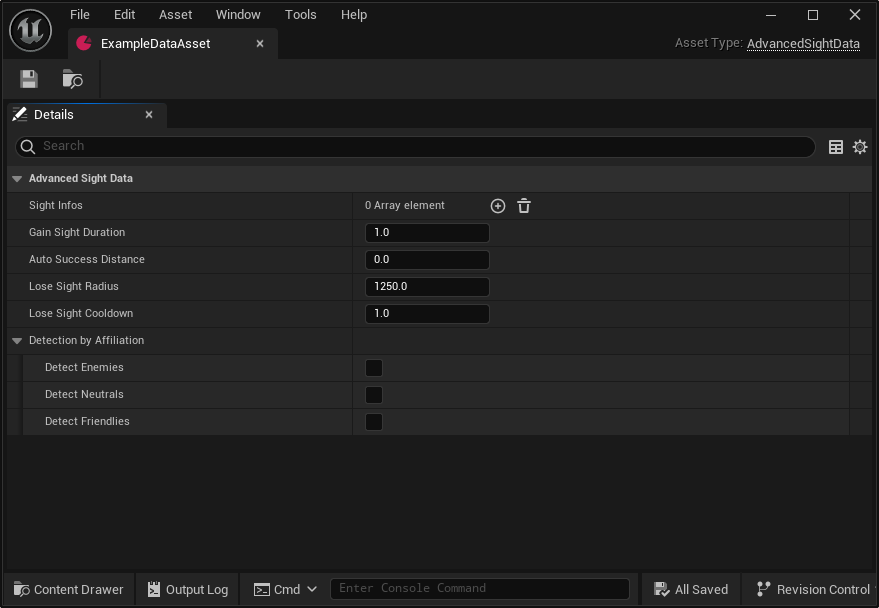
Please note that a lot of properties have additional comment visible when you keep your mouse hovered on a selected property.
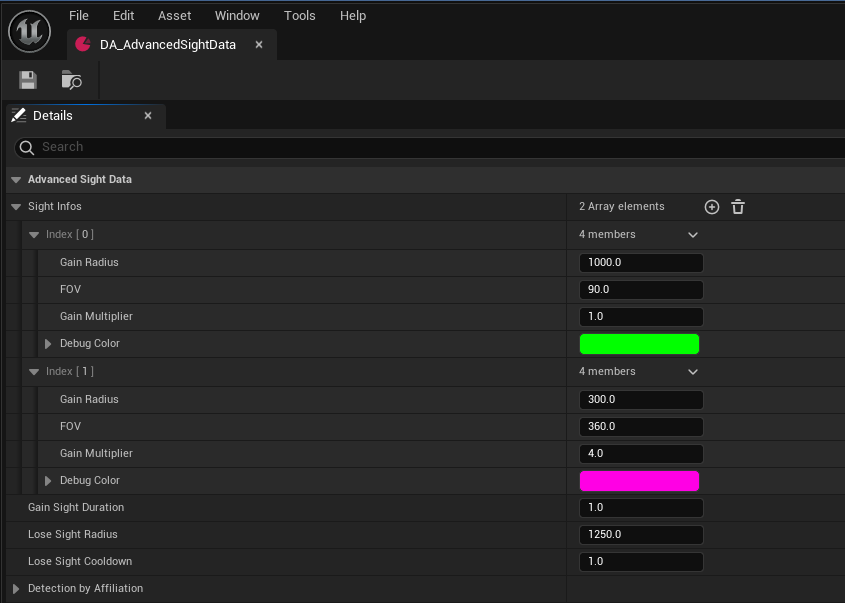
For this project I will add two sight infos structs, one that will cover long distance 90 degrees view in front of an agent, and second that will be short range but 360 degrees around the agent. I’ll also udpate the debug color so they distinguishable later when we use debug tools. The data asset configuration should look like this:
Final step in the data asset configuration is to set the detection by affiliation flags. Expand the property and tick Detect Enemies.
Now go back to the AIController blueprint we created before, select AdvancedSight component and in the Details panel find SightData property. Then set it’s value to the new config we just created and configured.
There are more properties but we don’t need to worry about them for the basic setup. To learn more about remaining properties please refer to the API page or read comment for each property visible when hovering mouse cursor on top of the property’s name.
Last thing to note is that the AdvancedSight exposes few events that are extremelly useful in implementing custom logic. Those events can be found under Events category in the details panel when AdvancedSight component is selected.
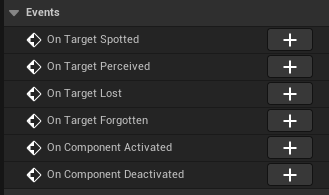
Press + button next to any of the On Target Spotted, On Target Perceived, On Target Lost and On Target Forgotten and hook them with a simple print string function to better understand when each of the event’s is called. For more details on how events work refer to the diagram in the Overview page.
Target Character
Each target actor that is either a listener (owner of the advanced sight component) or a target must do one of the three things:
- implement
IGenericTeamAgentInterfacewhich is a built-in Epic’s interface that can only be implemented directly in C++. - inherit from
Advanced Sight Characterclass which already implements the above mentioned plugin - add
Advanced Sight Teamcomponent to the actor BothAdvanced Sight CharacterandAdvanced Sight Teamcomponent already contain aTeam Idproperty that must simply be set to appropriate value in blueprint defaults. This ensures that you don’t have to make any C++ changes in case you are already using different base C++ class for your actor/character and can’t inherit fromAdvanced Sight Characterand you also can’t implementIGenericTeamAgentInterfaceyourself.
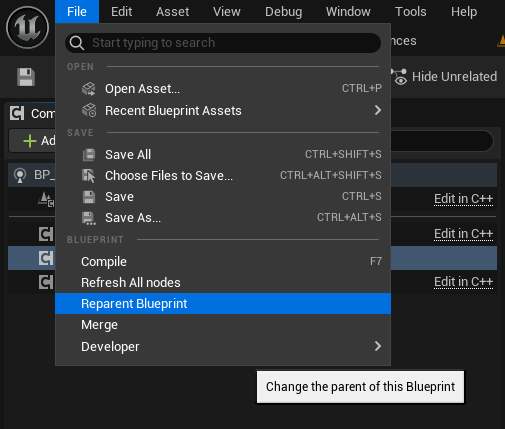
If you already have a character blueprint in your project and would like to use AdvancedSightCharacter for as your base class you can reparent your blueprint by opening a blueprint asset, selecting File in the top left corner and selecting Reparent Blueprint.
Keep in mind that both player character as well as NPC characters must implement IGenericTeamAgentInterface. This is because the TeamId property is used by the system and then generates appropriate queries. The TeamId is later used to determine attitude between two actors based on the generic solver (which treats same team id as friendly, all other team ids as hostile) or by using custom solver which uses data define in a data table for team relationships and set in the project settings.
If you use C++, remember to add AdvancedSight module reference to your game module’s *.Build.cs file. If you are getting unresolved external symbol errors despite adding AdvancedSight module to the PublicDependencyModuleNames you must also add AIModule module.
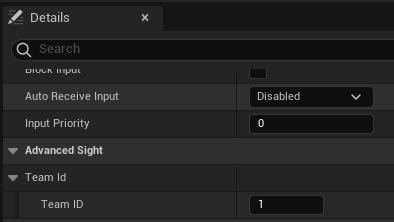
Third person template game comes with a BP_ThirdPersonCharacter blueprint which needs to be reparented as described above. Once reparented, in class default properties you should be able to find Advanced Sight category with TeamId property. It’s default value is 255 which is invalid value on purpose. Update the value to i.e. 1.
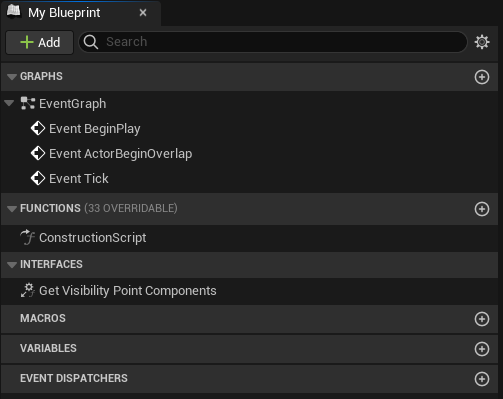
Next, open character’s Class Settings, navigate to Interfaces category and press Add button. In the expanded list find AdvancedSightTarget interface and select it.

There should be new function now visible inside the My Blueprint tab under Interfaces category called Get Visibility Point Components.
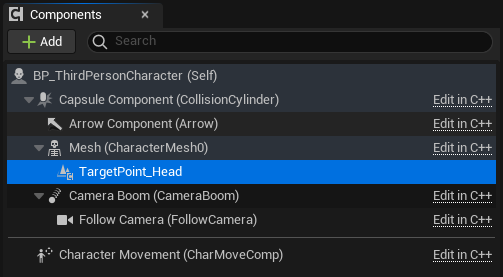
Now, select your character’s main mesh component, press Add button and add Advanced Sight Visibility Point as a child component to the mesh component. Name it however you want, I called mine TargetPoint_Head.
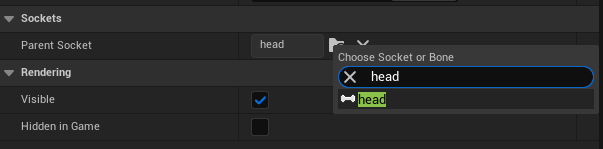
With the new component selected, go to details panel. Under Sockets category, set Parent Socket property to a head bone to attach the component to that bone.
Repeat above steps and create two more advanced sight visibility point components for left and right hand. Don’t forget to attach them to appropriate bones in the details panel.
Next, double click the interface function name in the My Blueprint tab. It should open blueprint editor with the following content:
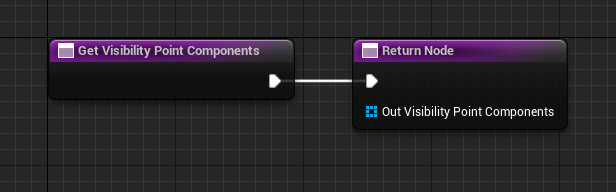
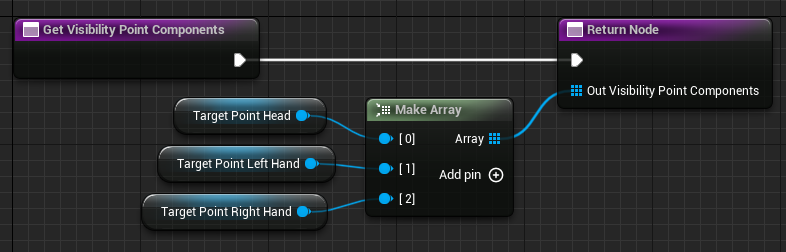
This interface function is used to fetch the references to the visibility points. We need to create an array and assign all created sight points to it. This is fairly easy operation. Final function should look like this:
Last step for the character setup is to attach Advanced Sight Target actor component.
Make sure you use Advanced Sight Target component, not the Advanced Sight component which we used when setting up AIController.
That’s it, there are no extra properties to set in the component, our character is set and ready to play.
Verification
To verify everything works fine we will use the ThirdPersonMap and set a simple testing scenario. Add new character to the scene by dragging and dropping the character’s blueprint we created above on a scene.
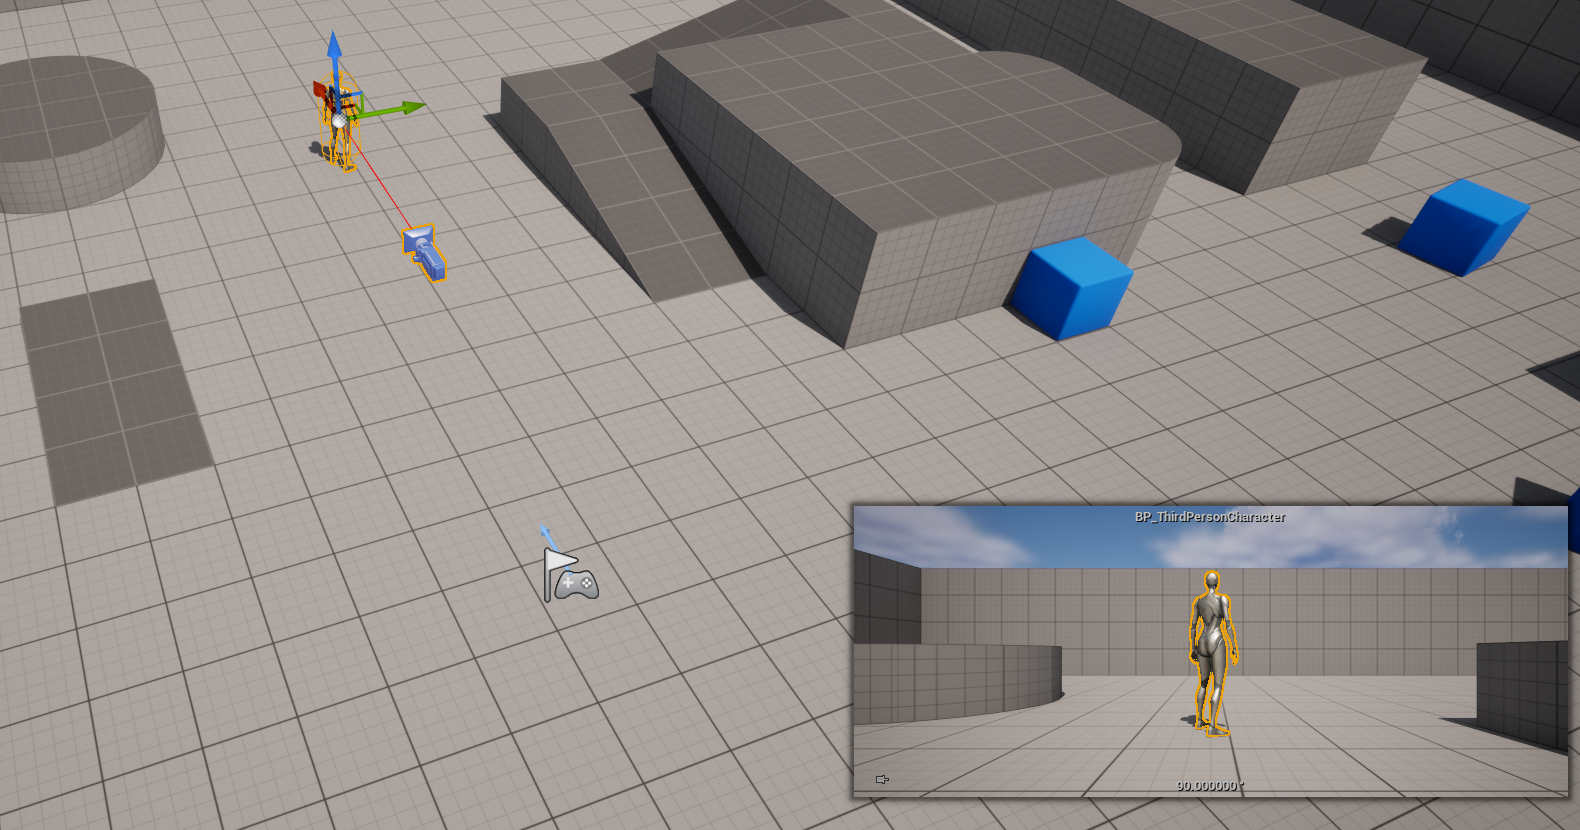
Inside details panel of the character, find Pawn category and make sure that Auto Possess AI is set to Placed in World and update AI Controller Class property to the AI controller we created at the very beginning.

Now search for TeamId property and change it to a different number between 2 and 254 inclusively. In this example I set it to 2. This is necessary step to ensure that system treat player character and NPC character as enemies and thus will generate sight queries for them.

Before starting PIE (Play In Editor) make sure that the NPC character is facing towards the Player Start actor. Then proceed and start PIE. The game should start without any issues. Now to see what’s happening under the hood we need to enable debugging tool. To do this press ~ (key might differ based on your local keyboard layout) to open console command prompt and type AdvancedSight.ShouldDebugDrawBasic 1. This should enable debug drawing and the game viewport will look like this:
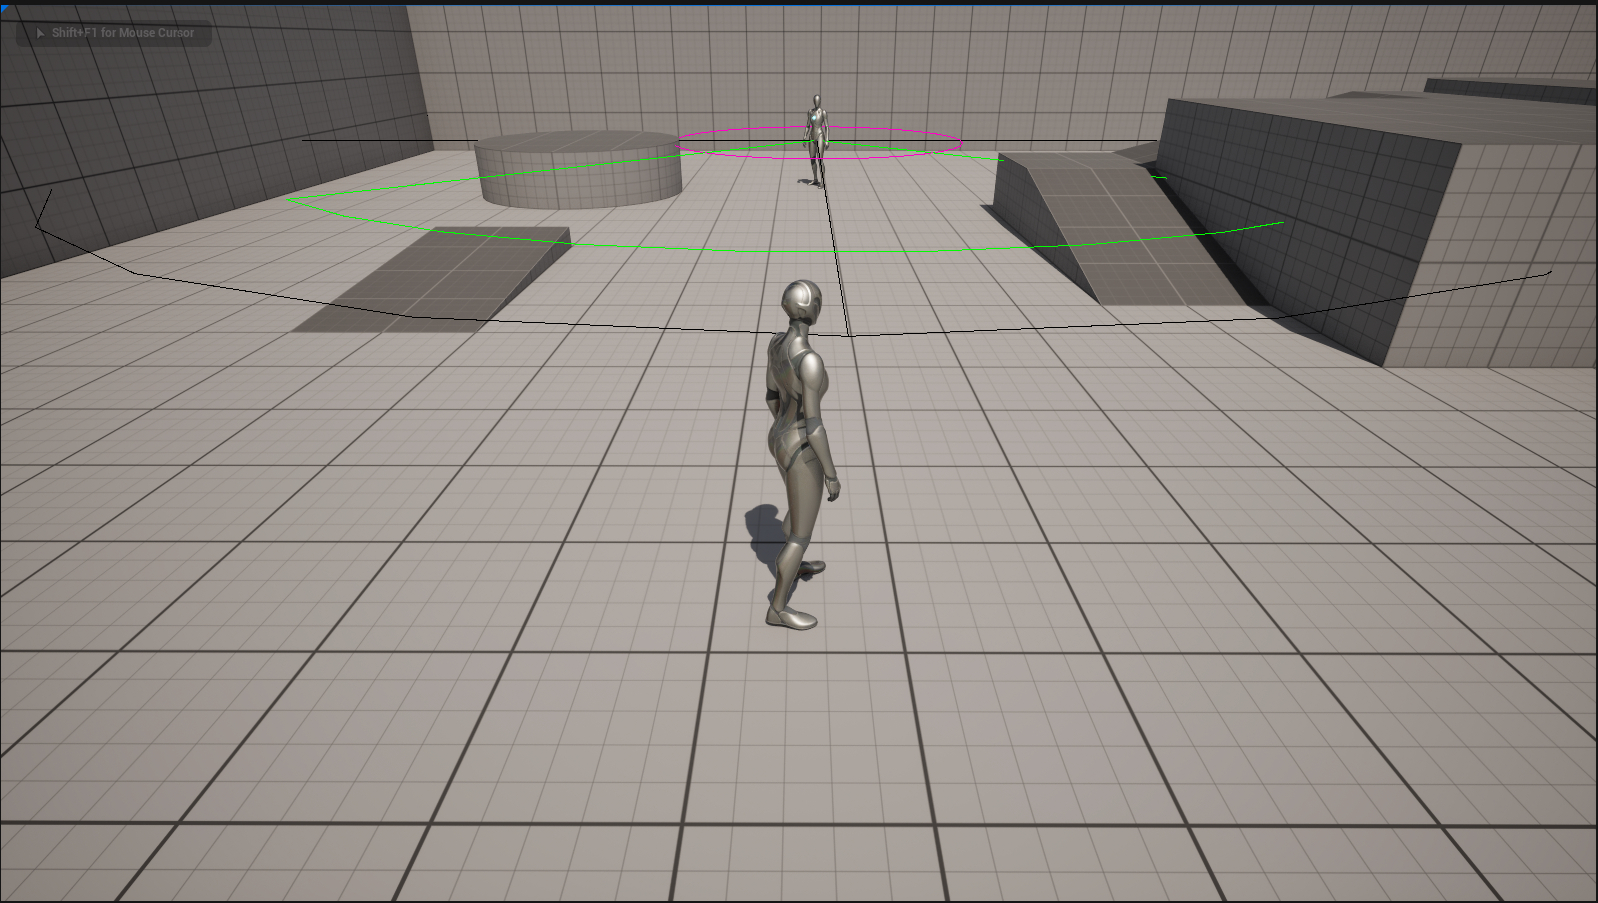
Notice that colors used here in the debug drawing matches the colors we defined in the sight config data asset in the beginning of this getting started guide.
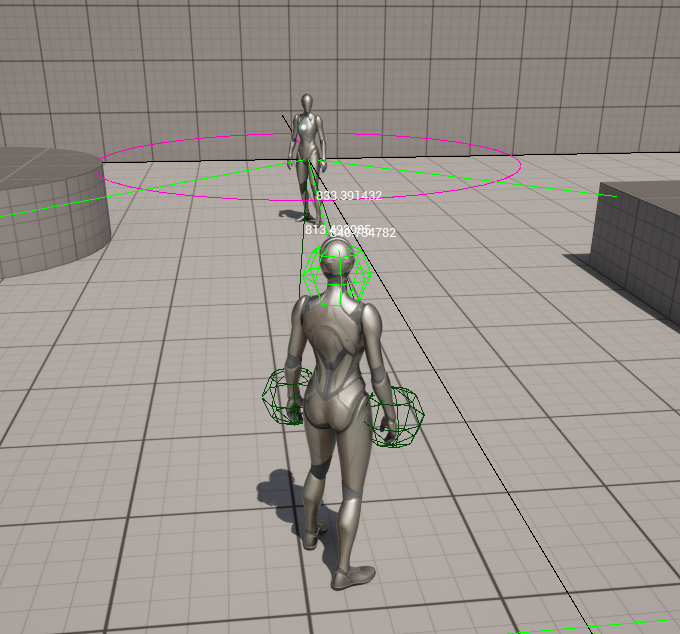
Walk into the sight range and notice that spheres matching the visibility points locations immediately appear and there is a line of sight drawn from the NPC character towards each of them.
For details on how to properly use debug visualization refer to a Debug page.
If your game viewport looks similar it means you setup everything correctly and are ready to implement your own logic! Have fun!